

Appearance
How to install OpenClaw on a VPS in 10 minutes
OpenClaw is an open source AI agent with over 100,000 stars on GitHub. It runs on your own server and talks to you through messaging apps such as Telegram, WhatsApp, Discord and Signal. Unlike a regular chatbot it actually performs tasks: runs commands, controls a browser, reads email, works with files and APIs. This guide walks through installing OpenClaw on a VPS, from the first SSH login to the first message to your AI assistant in Telegram.
Why install OpenClaw on a VPS
You can run OpenClaw on a laptop or home computer, but that has limits:
- The agent works only while your computer is on. Close the laptop and OpenClaw stops answering in Telegram.
- Heartbeat tasks do not run. OpenClaw can wake up on a schedule to check email or deadlines, which needs a machine running 24/7.
- Load on your hardware. A background daemon with connections to messengers and LLM providers uses resources all the time.
- Availability. Channels like WhatsApp need a stable IP and a constant connection.
A VPS solves all of this: it runs around the clock, has a static IP, and the agent stays reachable from any messenger. Even the entry plans on our pricing page are enough for OpenClaw.
What you need
- A Linux VPS, Ubuntu 22.04 or 24.04 recommended. If you do not have one yet, follow how to buy a VPS.
- At least 1 vCPU, 2 GB RAM and 20 GB of disk. That is enough for OpenClaw with cloud models from Anthropic, OpenAI or Google.
- SSH access. The server IP and root password are in the Cloud Servers list of the panel.
- An API key from an AI provider, for example Anthropic (Claude), OpenAI (GPT), Google (Gemini) or OpenRouter.
- An account in the messenger you want to use. Telegram is the easiest place to start.
Step 1. Connect to the VPS via SSH
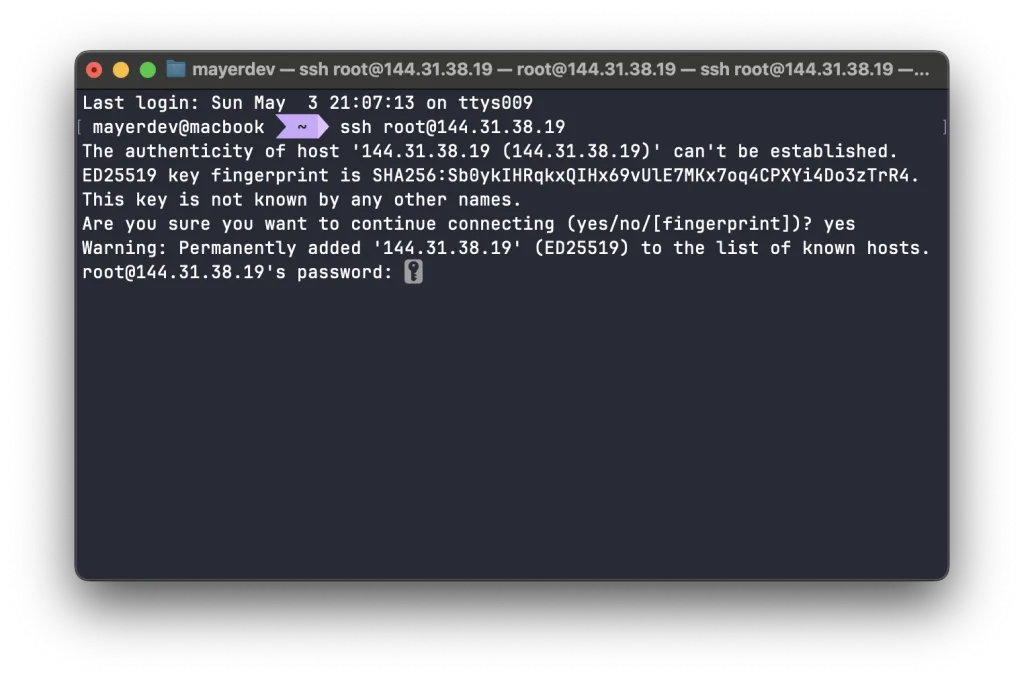
Open a terminal (PowerShell or PuTTY on Windows) and connect with the IP and root password from the panel. If this is new to you, see how to connect via SSH.
bash
ssh root@YOUR_SERVER_IPOn the first connection confirm the fingerprint with yes, then enter the password.
Update the system right away:
bash
apt update && apt upgrade -y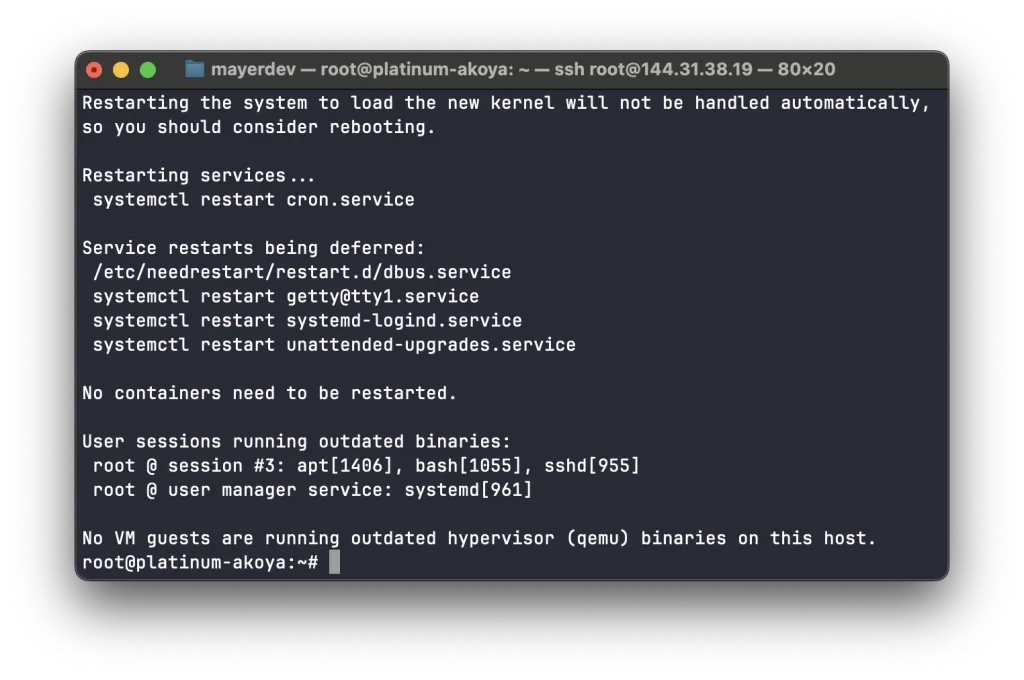
Step 2. Install Node.js
OpenClaw is built on Node.js and needs Node.js 24 (recommended) or at least Node.js 22.14. The version in the Ubuntu repositories is usually older, so install Node.js from NodeSource.
Install the helper packages:
bash
apt install -y curl ca-certificates gnupgAdd the Node.js 24 repository and install it:
bash
curl -fsSL https://deb.nodesource.com/setup_24.x | bash -
apt install -y nodejs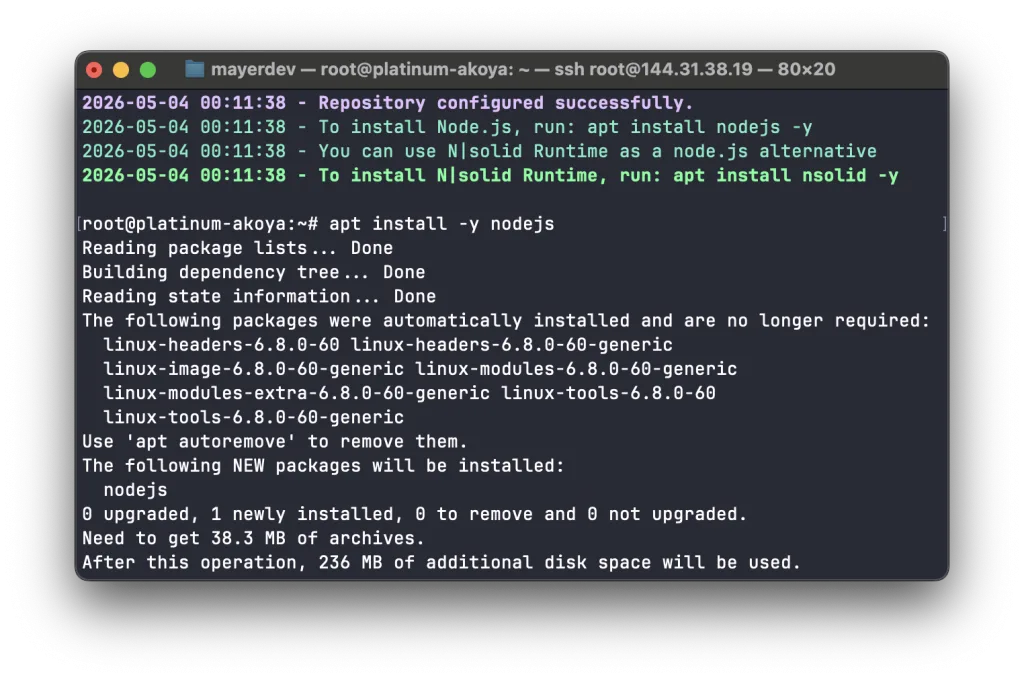
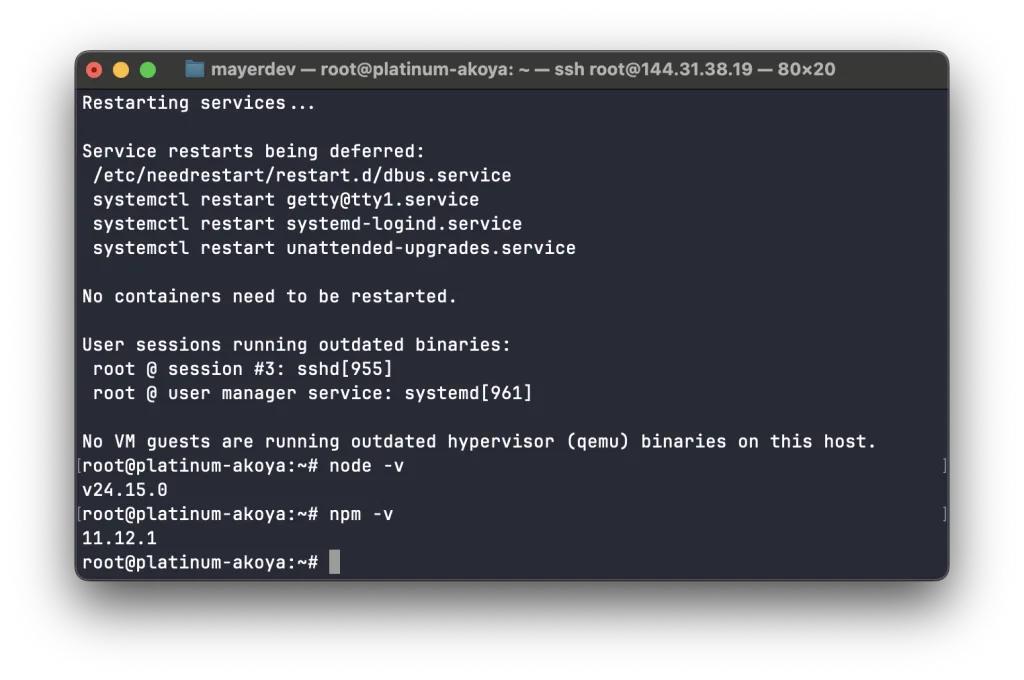
Check the versions:
bash
node -v
npm -v
You should see something like v24.x.x and 10.x.x or newer.
Step 3. Install OpenClaw
Install OpenClaw globally with npm:
bash
npm install -g openclaw@latestThe download takes 1 to 3 minutes depending on the connection.
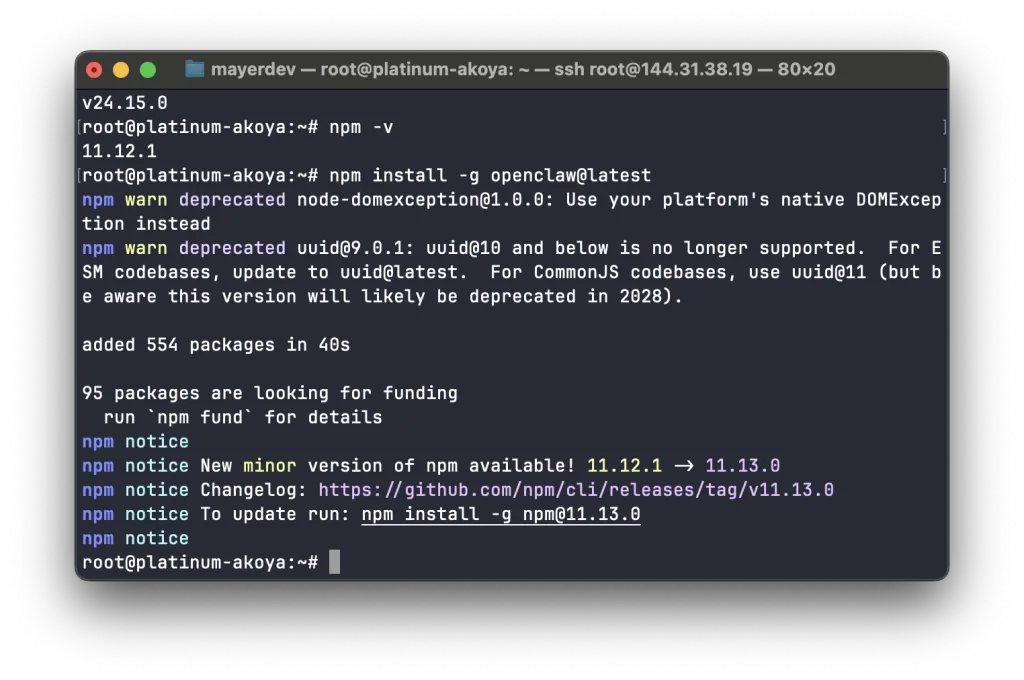
A warning about the npm version can be ignored. Check that the command is available:
bash
openclaw --version
Step 4. Run onboarding and install the daemon
The interactive wizard openclaw onboard connects your model API key, sets up the workspace and the messaging channels. The --install-daemon flag installs OpenClaw as a systemd service, so it runs in the background and starts again after a reboot:
bash
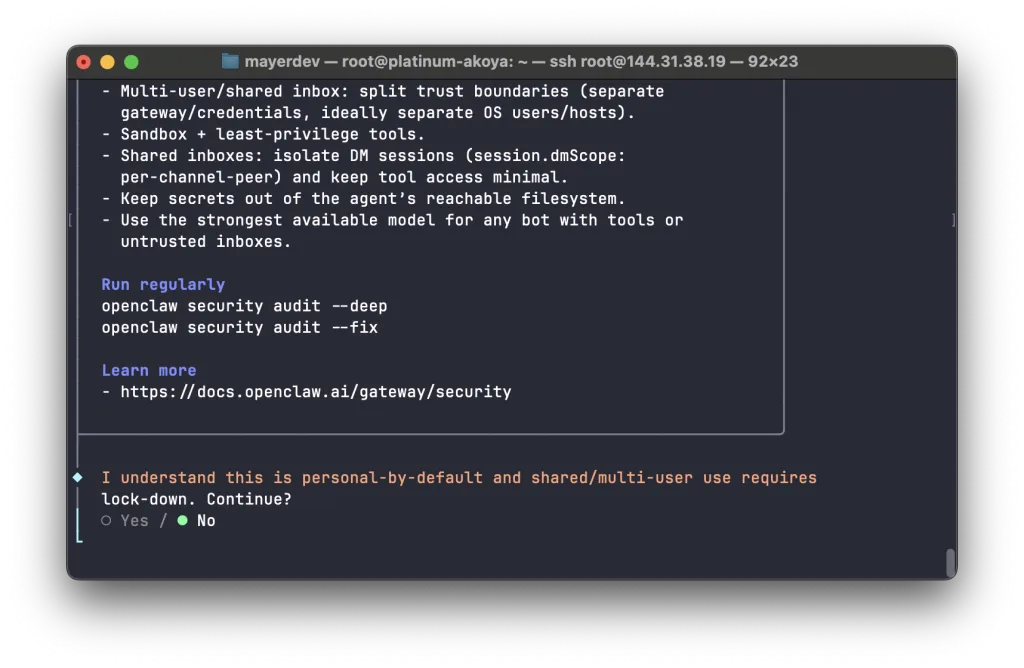
openclaw onboard --install-daemonFirst the wizard warns about security risks in multi user setups. Accept and continue.
In Setup mode choose QuickStart.

Pick the AI provider. This guide uses OpenRouter, which offers many models and accepts crypto top ups.
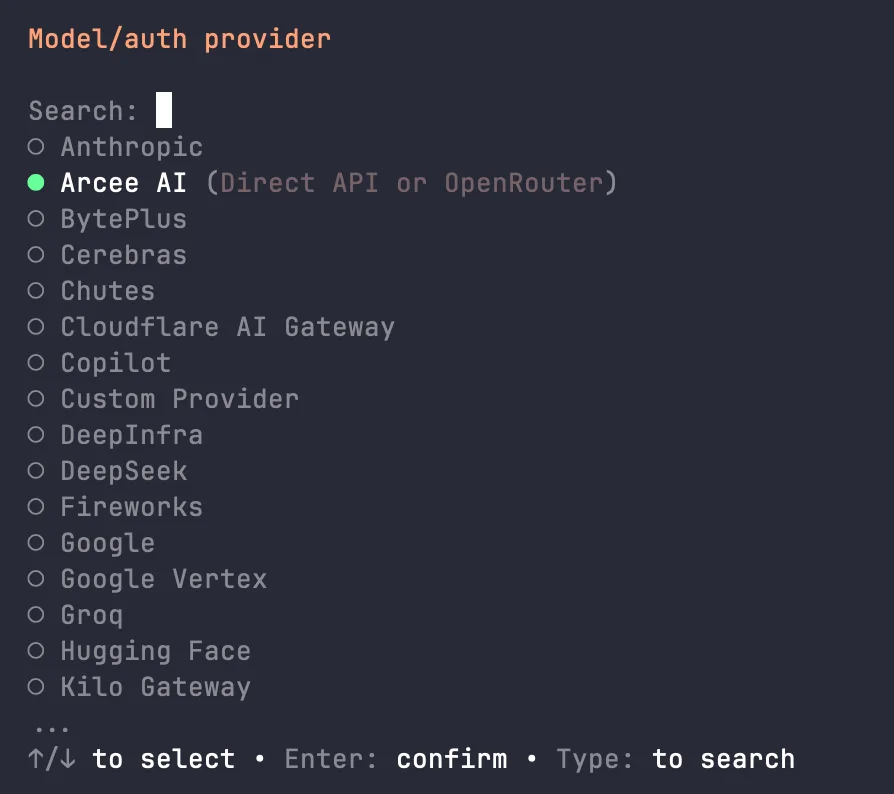
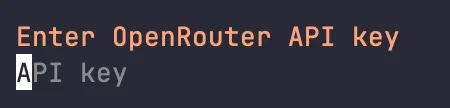
Paste the provider API key.
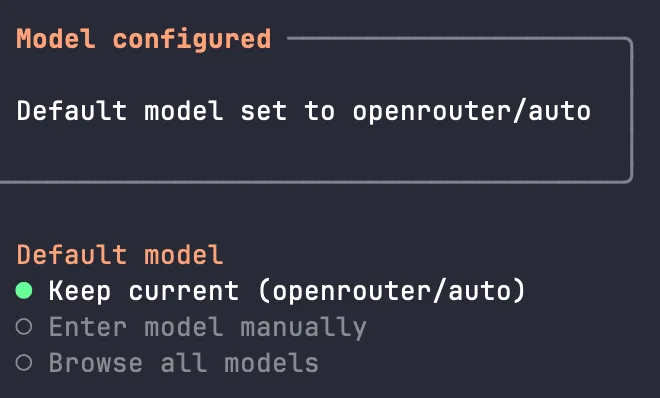
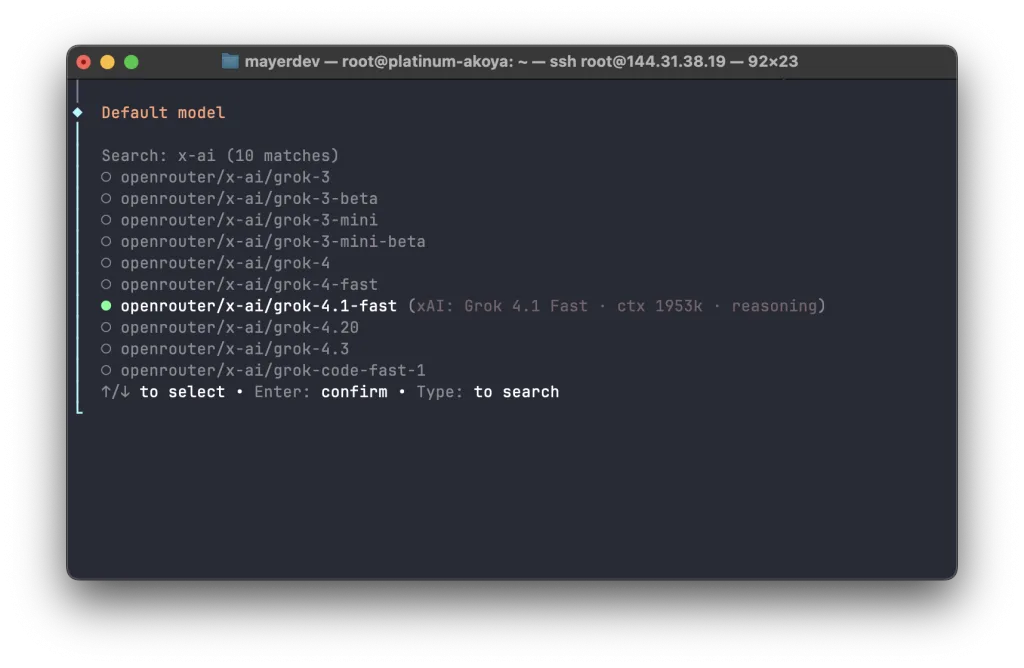
Choose the model. Instead of the default openrouter/auto, select Browse all models and pick a specific one.
For simple tasks an inexpensive model such as Grok 4.1 Fast is fine. You can switch models later in the settings.
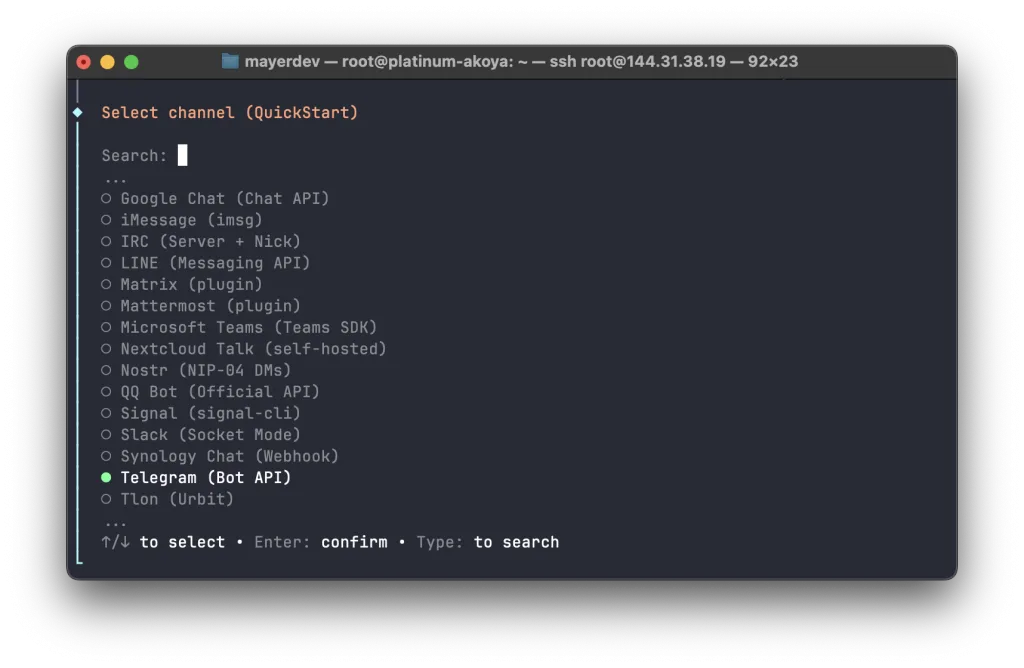
Choose the channel for talking to the agent. This guide uses Telegram (Bot API).
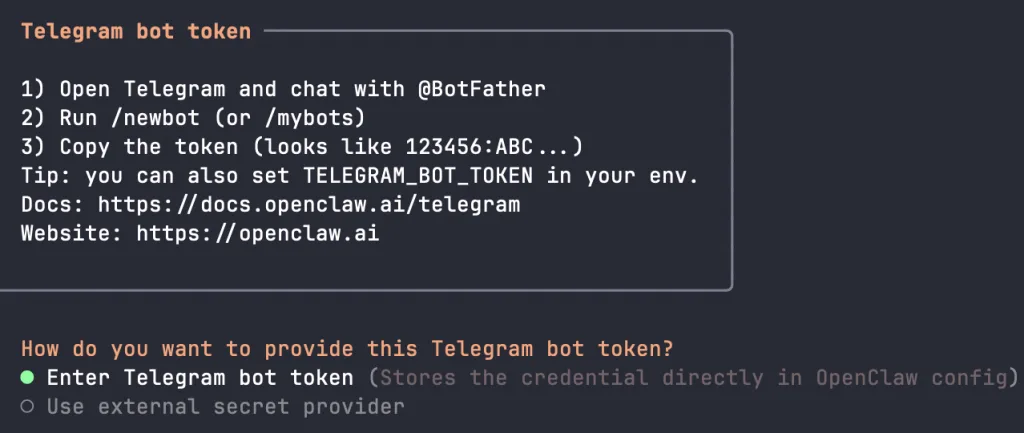
Create a bot with @BotFather, then choose Enter Telegram bot token and paste the token.
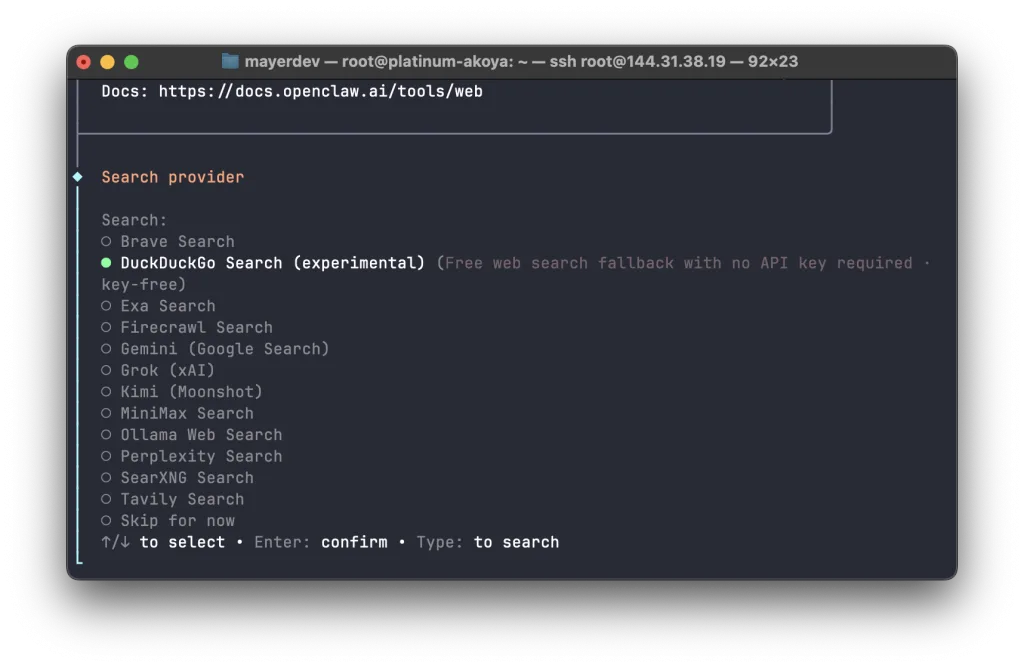
Pick a search provider. DuckDuckGo is the easiest one because it needs no account or API key.
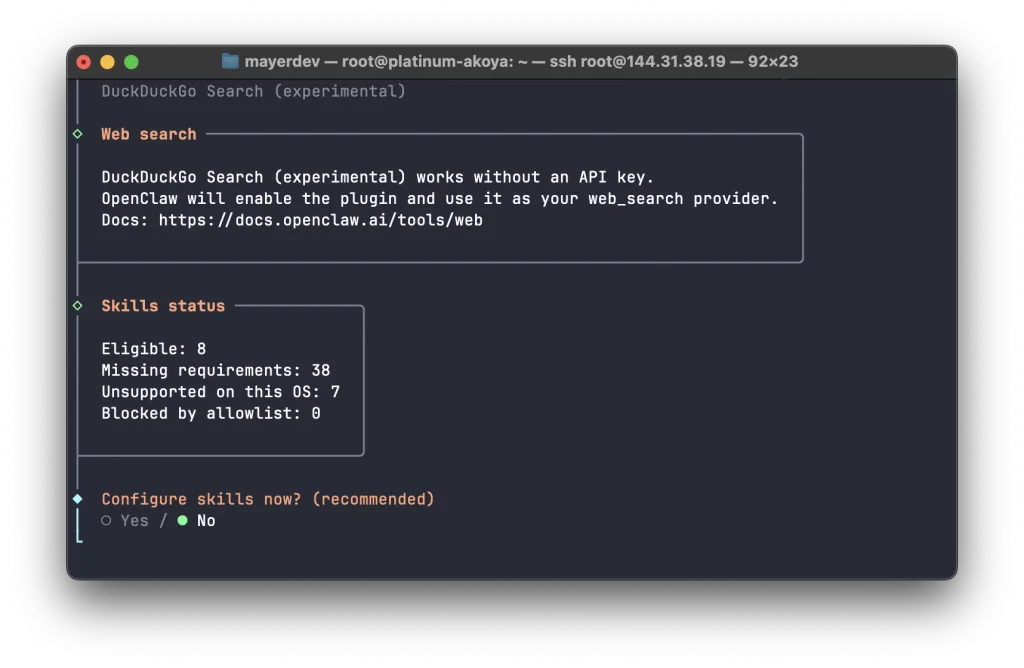
Skip the skills setup for now. You can add skills at any time later.
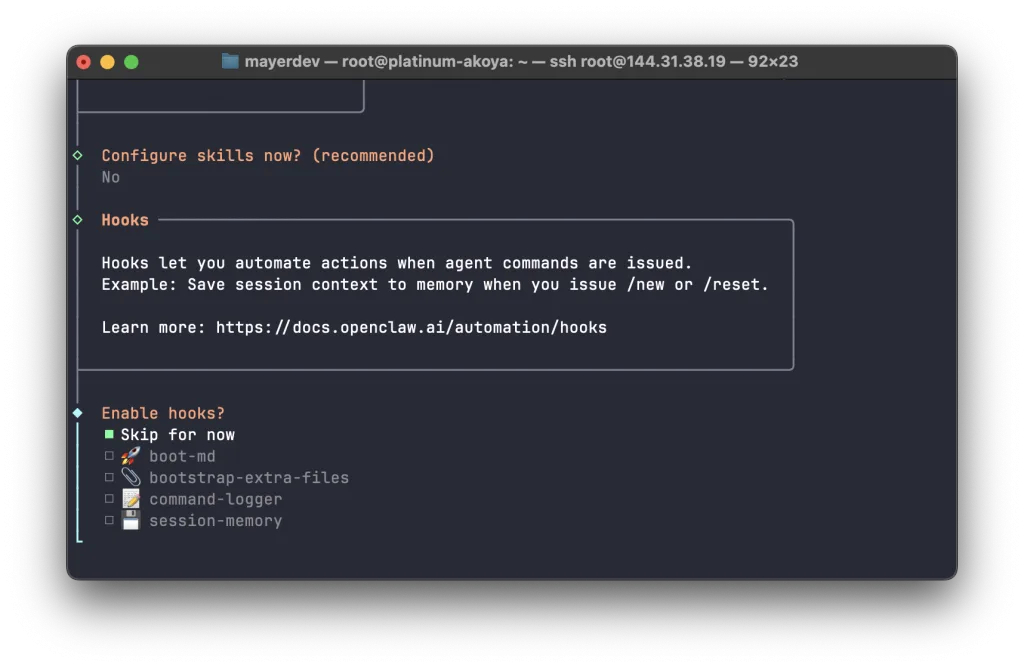
For hooks press Space and then Enter on skip for now. Automation hooks are not needed yet.
Choose the first, recommended option and press Enter.
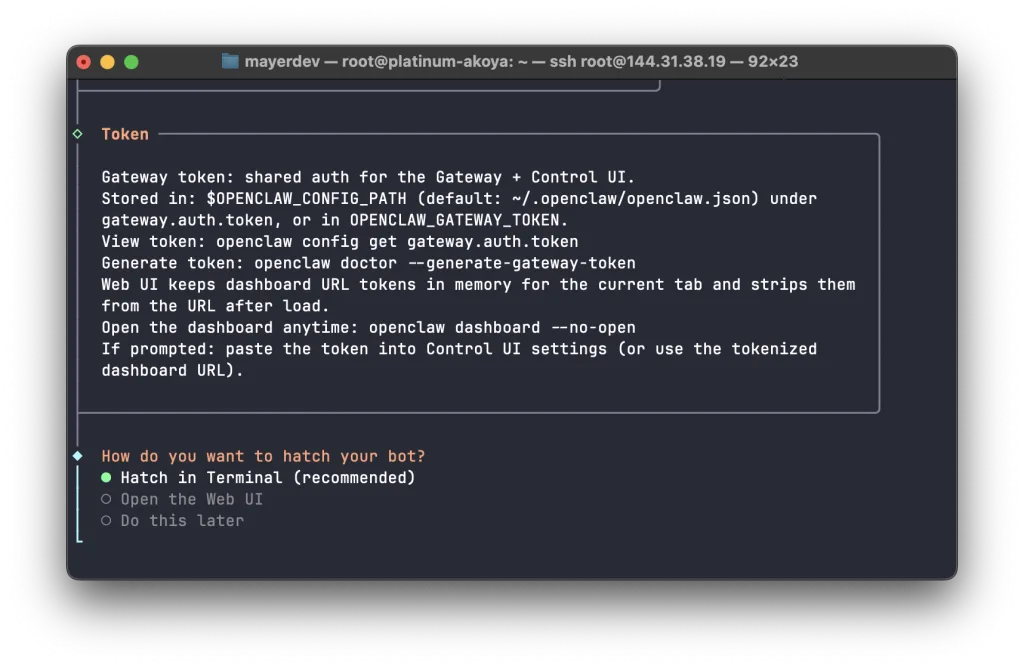
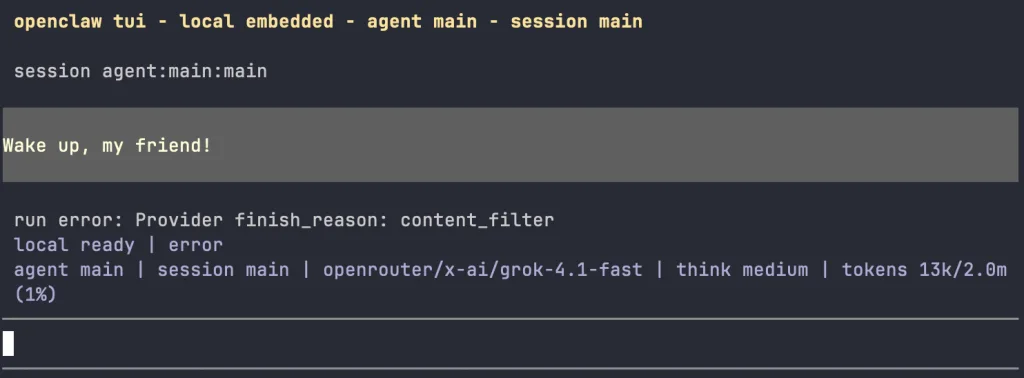
You land in the OpenClaw TUI. Ask the model a test question or type /quit to finish.
Onboarding is complete.
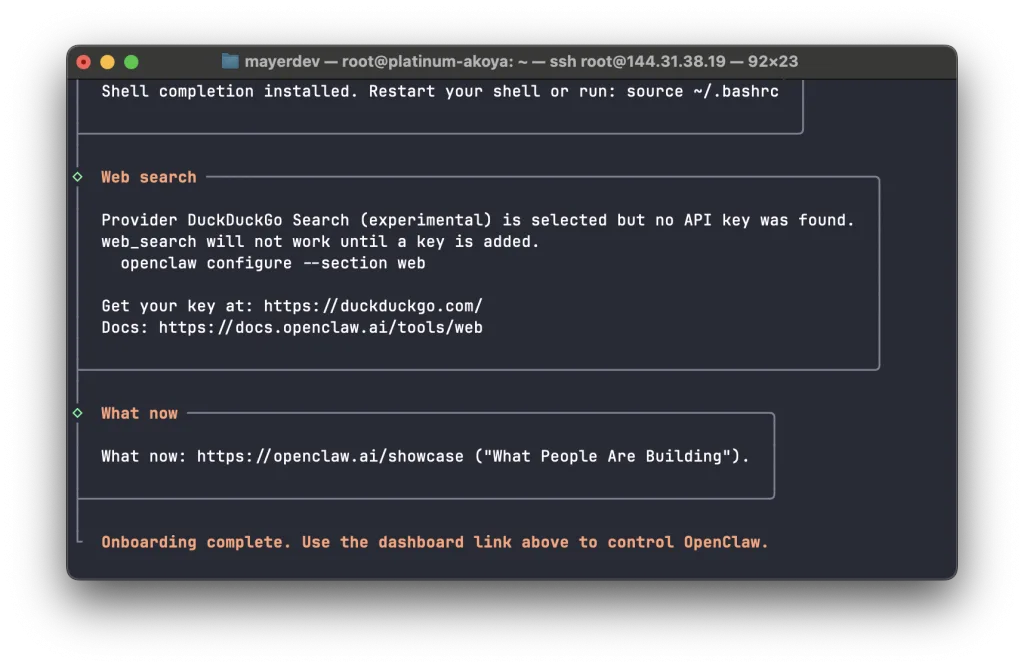
If the terminal seems stuck
Sometimes onboarding stays in this state without showing a new prompt. Press Ctrl+C.
Step 5. Check that the agent works
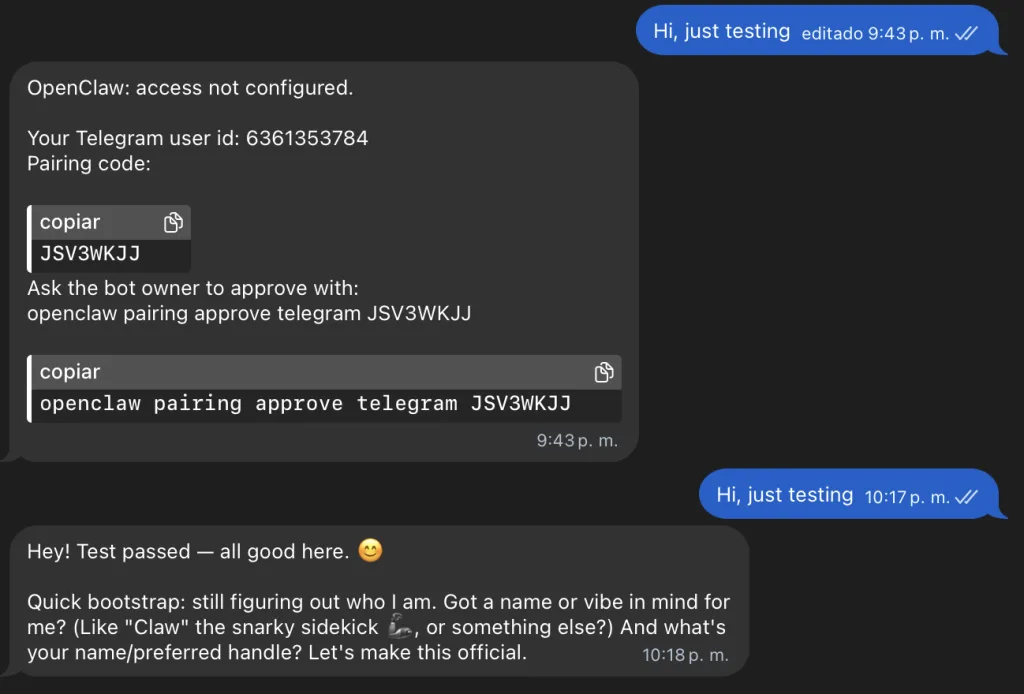
Open Telegram, find your bot by its username and send any message, for example "Hi, just testing".
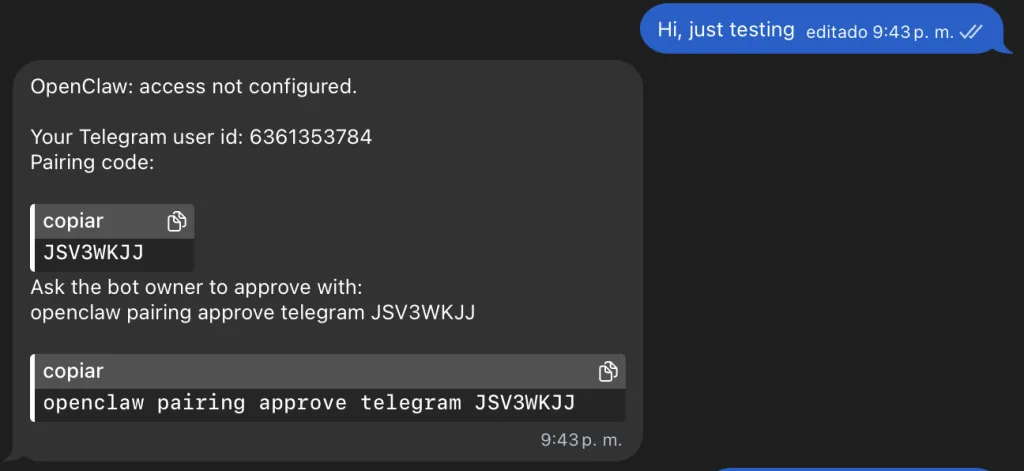
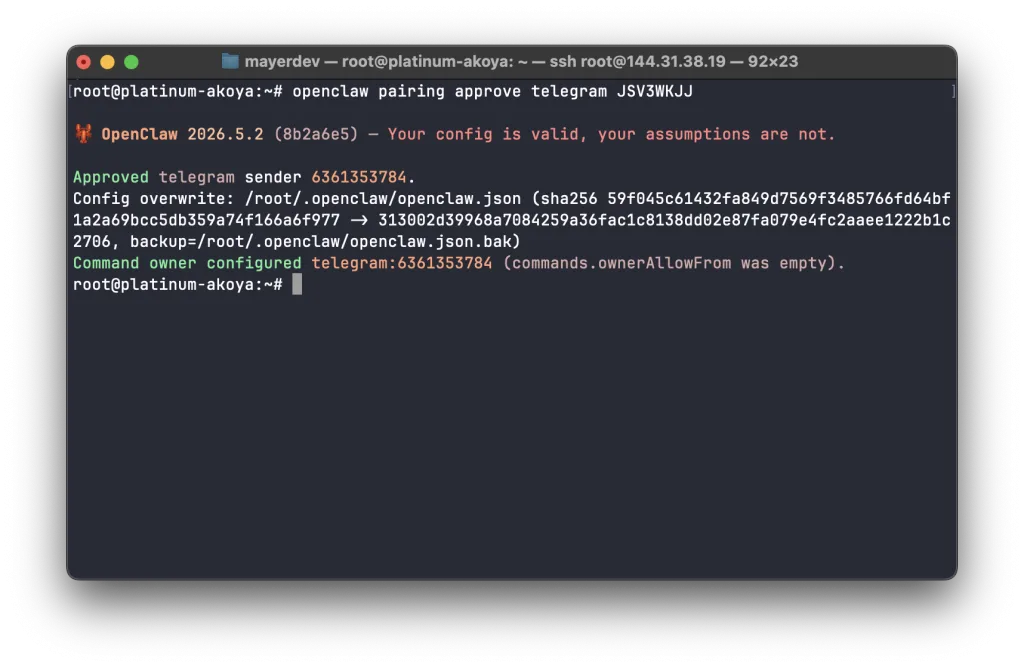
OpenClaw first asks you to confirm the link to your Telegram account. Run the command from the bot's reply on the server. Your pairing code will be different from the one in the screenshot.
Message the bot again. When it replies, everything works.
Open the OpenClaw dashboard
OpenClaw runs a web dashboard at http://127.0.0.1:18789/ for chats, configuration and sessions. It listens only on the server's localhost, so it is not reachable from the internet, which is the safe default.
To open it, create an SSH tunnel on your own computer, not on the server:
bash
ssh -L 18789:127.0.0.1:18789 root@YOUR_SERVER_IPWhile this session is open, go to http://127.0.0.1:18789/ in your browser.
What to do next
OpenClaw becomes really useful with skills, modular instructions in SKILL.md format. Install ready ones from ClawHub or write your own. Ideas to try:
- connect Gmail or another mailbox so the agent reads and answers email for you;
- set up heartbeat tasks so OpenClaw checks the list in HEARTBEAT.md every hour;
- add a second channel such as Discord or Slack;
- connect a local model through Ollama if you want requests to stay on your server.
How much server you need for OpenClaw
When idle, the OpenClaw gateway uses 150 to 300 MB of RAM and almost no CPU. Load appears only while messages are processed, the agent calls the LLM API and runs tools such as a browser.
| Scenario | Recommended resources |
|---|---|
| Telegram bot with a cloud model | 1 vCPU, 2 GB RAM |
| Several channels and browser automation | 2 vCPU, 4 GB RAM |
| Local 7B models through Ollama | 8 GB RAM or more |
| Local 13B models and larger | 16 GB RAM or more |
All current plans are on the pricing page. Not sure which one fits? Contact us and we will help you choose.
Summary
Installing OpenClaw on a VPS takes 10 to 15 minutes: install Node.js, install the npm package, run onboarding with the daemon flag and connect a channel. You end up with a personal AI agent that runs 24/7, is available from Telegram or any other messenger, and stays fully under your control.